I walked in the door and smells of thyme and sage met me first, then the mild onion, then the roasting turkey. My daughter followed me--"Smells like Thanksgiving!" she said. And she was right! After trying a multitude of different recipes over the years, I found a recipe for Herbed Turkey with Shallot gravy in a Bon Appetit in 2000 and I've never looked back. There is good reason that the comments say 100% would make it again. Over the years I've updated and changed a bit, but it's still the turkey that makes my tender loving care in the herb garden all year worth it all!
Cooking a turkey for the first time? Or maybe for the hundredth time like a few of us oldies. . Cooking a turkey isn't trivial--there is usually a significant investment of money and emotion in the holiday turkey. And unfortunately, there are lots of variables that can effect how it turns out, which is what separates a mere recipe from an art form.
 Save Recipe
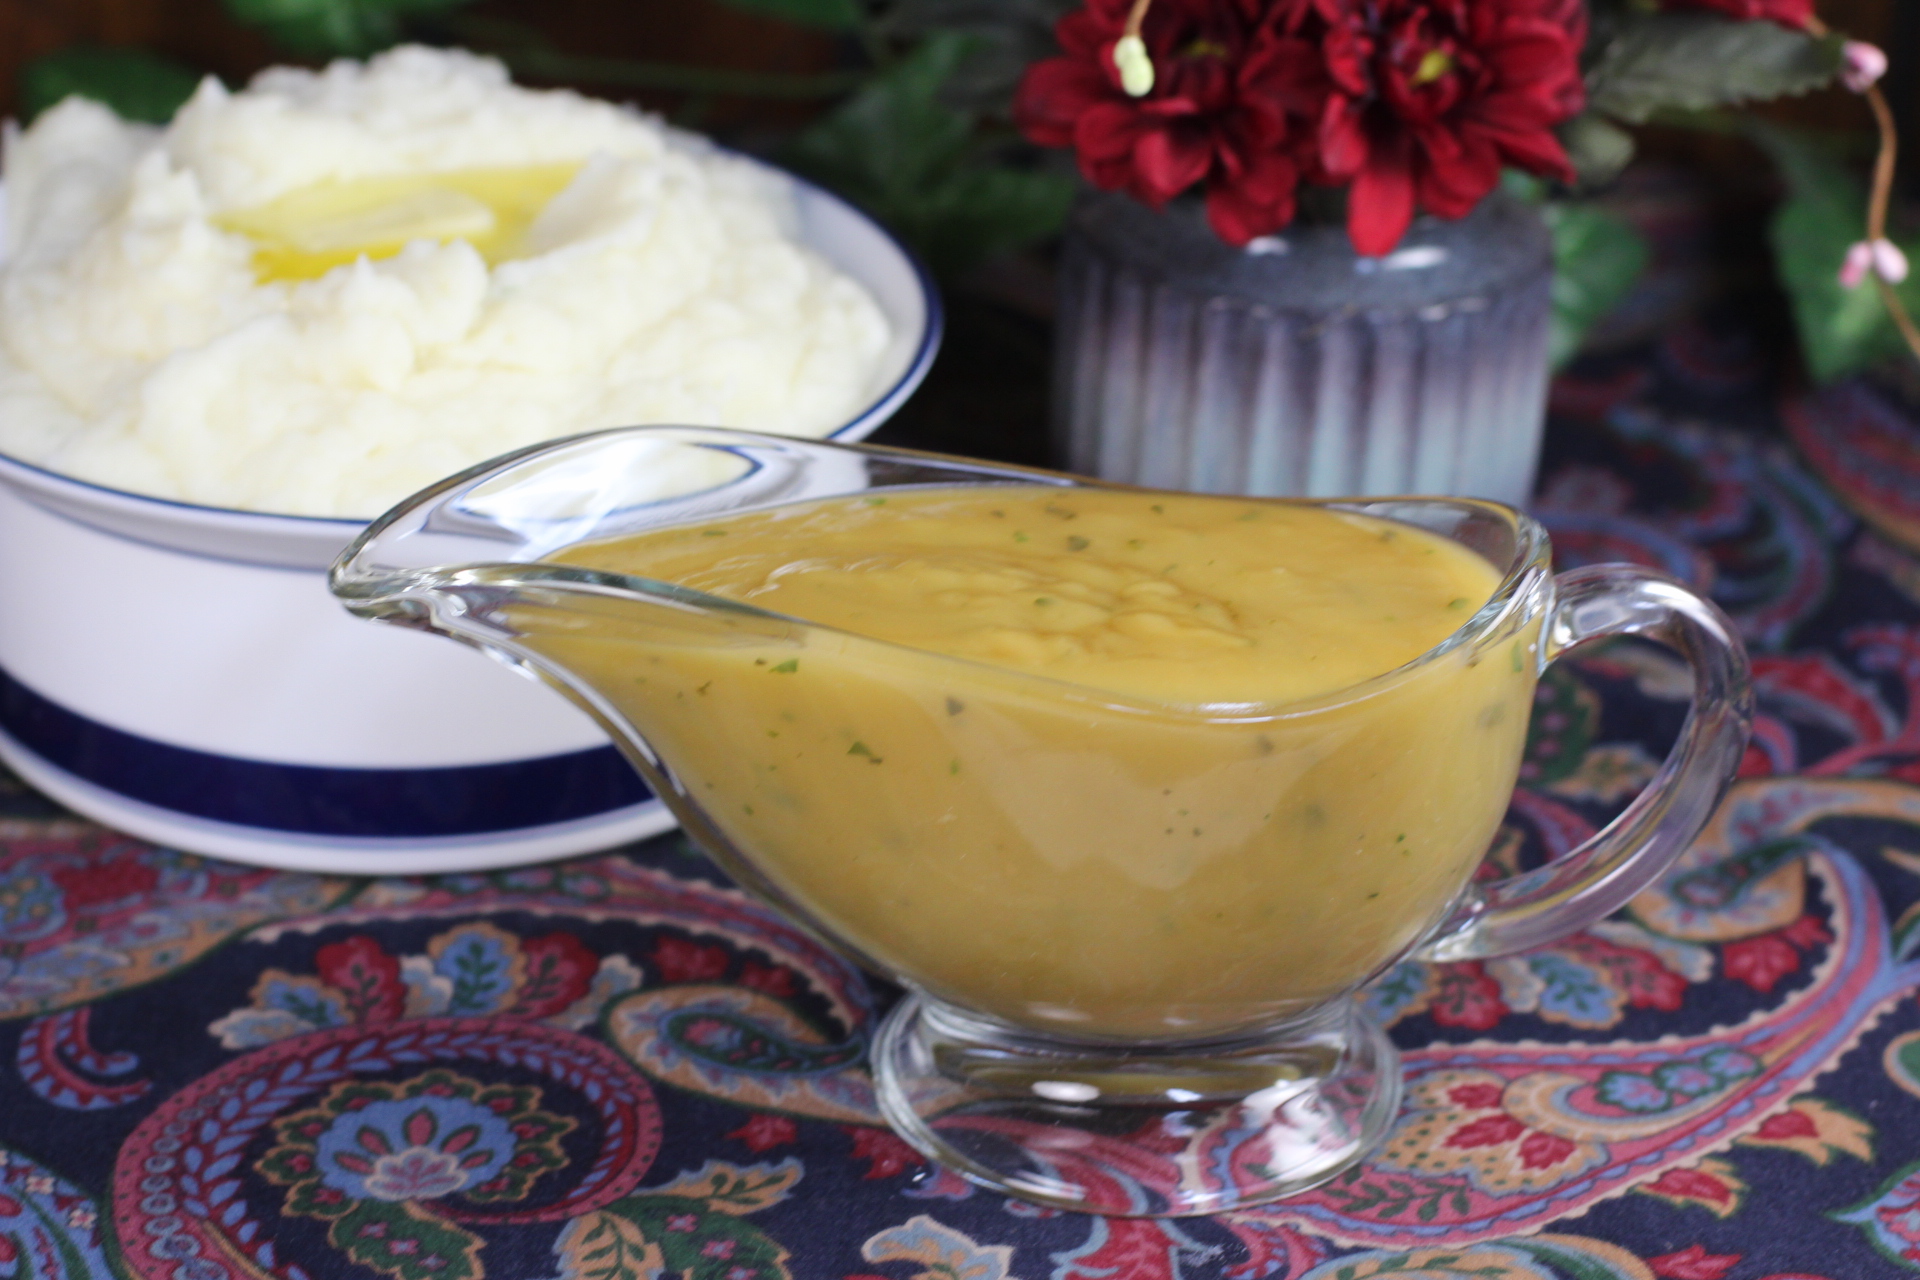
Ingredients
- 1/2 cup (1 cube) butter, room temperature
- 2 T. fresh parsley, chopped plus 2 sprigs
- 1 1/2 T. fresh sage, chopped plus 2 springs
- 1 1/2 T. fresh thyme, stripped from stems plus 2 sprigs
- 3/4 t. salt
- 1/2 t. pepper
- 1 16 lb turkey
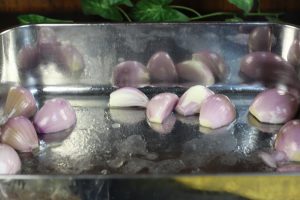
- 1 lb shallots, peeled and cut lengthwise
- 4 c. chicken stock (or more)
- 1 c. Ultra Gel (approximately)
- 3 T. flour
Instructions
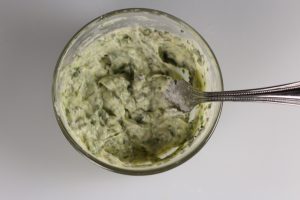
- Cut the parsley and sage together until very fine. Add the thyme leaves, salt, and pepper. Mix into the softened butter with salt and pepper until smooth (may be covered and refrigerated for up to three days).
- Prepare the turkey by removing the neck and giblets and rinsing. Pat dry and salt inside.
- Insert the herb sprigs and 2 shallots to the inside of the turkey.
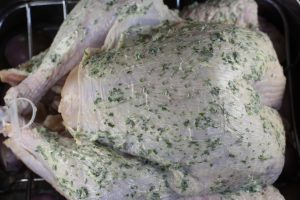
- Put the turkey on a rack in a roasting pan. Put half of the butter/herb mixture into a different container and reserve--brush the other half of the mixture over the turkey.
- Add the remaining cut shallots to the roasting pan around the turkey.
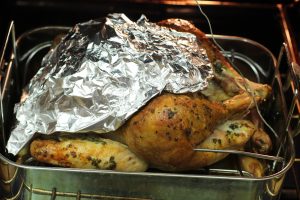
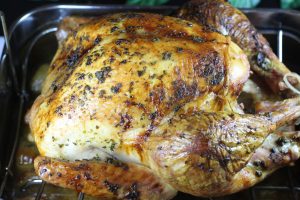
- Roast the turkey in a 350 degree preheated oven. The bird will start to develop a lovely golden color. If at any time during the roasting process the shallots in the pan appear to be burning, add some chicken broth to the pan. When the breast meat gains sufficient color, cover it with foil and continue roasting until the internal temperature of the thickest part of the thigh is 170 degrees. Monitor the temperature with a thermometer.
- Remove the turkey from the oven to a serving tray and allow it to rest while the gravy is prepared.
- To make the gravy:
- Add whatever chicken broth you haven't used to the roasting pan and put on the top of the stove on one or two burners and cook at a high heat, stirring frequently, to loosen any of the flavorful crispy turkey drippings. Pour the pan liquid through a sieve into a bowl and evaluate how much you have. Wipe the roasting pan out with a paper towel or use a different pan to continue.
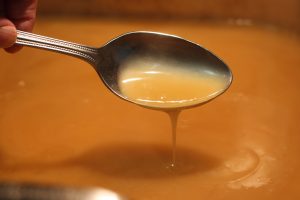
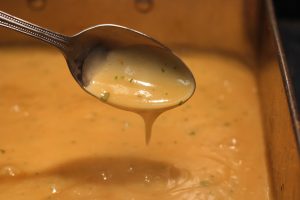
- Add additional stock or broth to achieve your target amount (see explanation), remove as much fat from the top as you can, and return the gravy base to the stove. Season to taste, then stir in the Ultra Gel® gradually with a wire whisk. The gravy does not need to be boiling--in fact, it will be easier if it isn't. Continue to add Ultra Gel® until the gravy coats a spoon nicely.
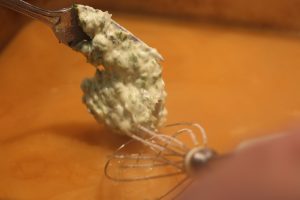
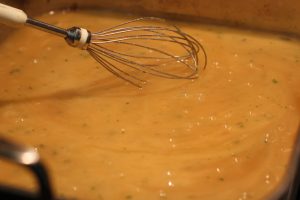
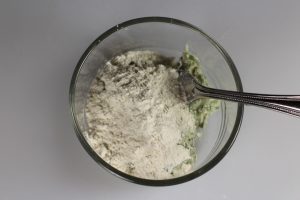
- Bring the gravy to a boil. Add the reserved butter/herb/flour mixture to the boiling liquid. It is added for color and flavor, as the gravy has already been thickened.
- Serve immediately.
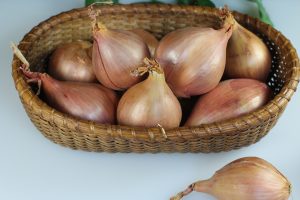
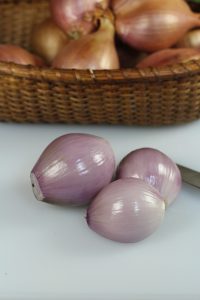
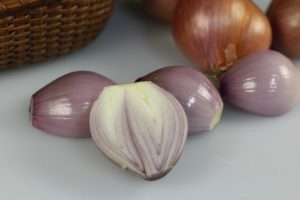
So--these are shallots. They're from the onion family but quite mild in flavor. I had never heard of them until I went searching in 2000. Now I know that in my area of the country (Pacific Northwest), I better grab them when I see them, as they aren't carried year-round and aren't always available. I was in Houston last year, though and they seemed to be plentiful and substantially less expensive, so I suspect this is a regional thing. Anyway, peel the shallots, remove the ends, and cut them lengthwise to prepare them for their destiny.
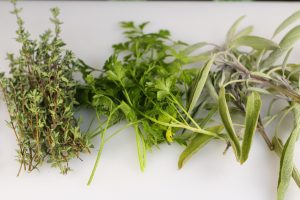
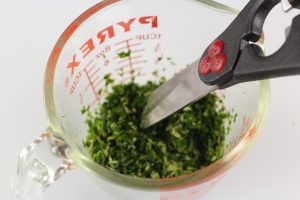
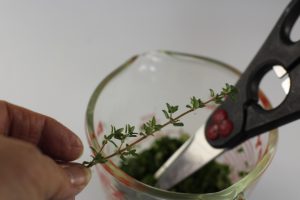
Next, prepare the herbs by rinsing and chopping. If you don't have your own herbs, get one of the packaged combinations that have these herbs. I think the easiest way to chop the parsley and sage is to put them in a glass cup and use shears to cut through until they're fine enough. (Yes, you can clean your paper scissors with soap and water or chlorine cleaner and use them). Thyme is a little different--it has a woody stem that wouldn't be very pleasant to eat, so prepare it by holding onto the leafy end, then sliding your fingernail down the stem, kind of like petting a cat the wrong way. The leaves will release. Then pull off the top quarter inch where you've been holding and use it as is--that part will be tender. Mix the chopped herbs with the softened butter, salt, and pepper and refrigerate for later. (This can be done ahead--and you will want to get this done and out of the way in preparation for the big day when kitchen space will be at a premium!)

Now--time for the bird, which needs to have been thawed. I cannot tell you the number of times I've misjudged the amount of time a turkey takes to thaw and ended up with a sink full of half-frozen turkey with cold water running over it to finish the thawing process! Optimally, you'll have the time and space to put the frozen bird in the refrigerator several days before so it can thaw slowly while keeping acceptable temperatures. If not, it's the cold water trick.
To prepare for roasting, remove the turkey from the plastic packaging, reach in the cavity and pull out the neck (I like to simmer this for stock for the gravy). Pull up the skin from the neck cavity and remove the little bag of giblets--you're on your own there--I'm not a giblet fan, so I discard them. But I know people who live for their giblet gravy, so it's a personal thing. Rinse the turkey and pat it dry with paper towels. Tuck the wing tips under the "shoulders" to keep them from burning. Salt the big cavity thoroughly, then add the sprigs of herbs you have saved and a couple of peeled shallots.
Divide the herb butter into two somewhat equal portions. You will be using half on the raw turkey and you don't the other half to potentially become contaminated, as it will be used later. Take one portion and spread it over the turkey, using a pastry brush or paper towel. Add the 3 tablespoons of flour to the other portion and save for the gravy. Spread the rest of the shallot pieces in the roasting pan around the turkey. Start roasting at 350 degrees. Don't open the oven any more than necessary, but monitor it for color--when the color gets to where you're liking it, cover the breast with foil to protect it from more browning while the internal heat gets to 170 degrees in the thickest part of the thigh. Look at the photo with the foiled turkey--see the thermometer that is in the thigh? It is a type of thermometer that can be left in the turkey as it roasts, giving a read out on a screen that stays outside the oven. Or you can use an "instant read" thermometer, which you insert each time you want to check the temperature. They aren't expensive and worth every penny. You can save the price with one overdone steak.
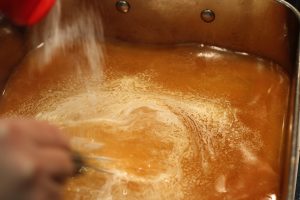
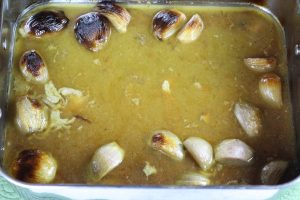
Now--for the gravy--which is what this post is all about. When you've removed the turkey to the serving plate and tented it with foil to keep it hot, the pan with the juices will look something like this. Hopefully, the sugar in the shallots has done some carmelizing, which adds an amazing color and flavor. If the pan is mostly dry with crusty bits in it, that's great--this will be really flavorful as long as there is no burning. This is one of the challenges of turkeys--so much depends on the oven. Some ovens don't distribute the heat evenly, some oven heats and temperature dials bear no resemblance to each other, and sometimes you have to put the turkey on the lowest rack in order to get it in the oven. Those situations require special treatment. It's really nice to have an oven thermometer that resides in the oven so you can tell really how hot the oven is cooking. Then you can adjust the oven heat to get the results you want. If you have to put the rack really low and the bottom is threatening to burn, add some chicken stock to keep things moist and watch it closely. Put foil over the whole thing to try to equalize the heat if you have to. But back to gravy.
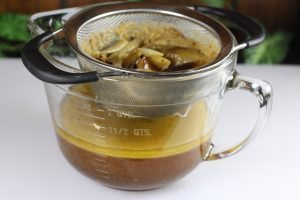
If you're lucky, you can put your roasting pan on the stovetop to make the gravy, as you want all of those yummy crusty bits to end up in the gravy. Add a quart of chicken stock to the pan and bring it to a boil, stirring to release any drippings. Then pour it through a strainer. If your family likes the flavor, the roasted shallots can be added back to the gravy where an immersion blender will smooth them nicely. Some people reserve the shallots to add to other dishes. But somewhere you end up with a measurable amount of gravy base. So here's the secret my grandmother taught me back in the early 70's.
Figure 1 1/2 servings per pound on a 16 lb turkey (a 22 lb turkey might go to 2 servings/lb and a 10 lb baby might only be 1). So that means we can plan for 24 standard servings of meat from the 16-lb bird. Then you'll need 1/3 to 1/2 cup of gravy per serving. So imagine all of your people around the dinner table and think of how they pour gravy--if there are a lot of adults and they like a lot of gravy, figure 1/2 cup per serving. Otherwise figure 1/3 cup of gravy per serving of meat. So 1/3 cup each serving x 24 servings says I would need 8 cups of gravy. Or 12 cups if I want 1/2 cup per person. So skim the fat from your gravy base and add enough chicken broth or stock to get to the number of cups you need. (This is where the broth from the cooked neck comes in). You might need to add some paste chicken base to boost the flavor. Anyway, season to taste, then start to thicken.** The pressure is on--it seems like there are hundreds of hungry eyes looking at the turkey, then you, then the turkey. This is where you need to feel secure and in control. Sprinkle the Ultra Gel® into the gravy base gradually, while stirring with a wire whisk. Continue adding until it coats the spoon. You will see a lovely clear-colored gravy because it is a cornstarch gravy. For general gravy-making, you can stop here and serve it up. But there ARE people in the world whole like the opaqueness of a flour gravy, and in deference to them, and because extra butter and herbs are really tasty, we can add the remaining herb/butter/flour mixture and bring to a boil for some truly beautiful gravy. There isn't enough flour to thicken this much gravy, but the combination of cornstarch and flour is really amazing. (Disclaimer here--the gravy really isn't this dark--the light isn't as good for photos.)